Creating a Static Site in GitHub Pages F23
Guidelines for the Lab:
Today in lab one of the things we will be doing is to create your own site at GitHub Pages in which you will do your coursework. Creating such a site will require us to set up GitHub, GitHub Desktop and a text editor, to learn and practice some Markdown and to get comfortable with editing on our own machine and then push slowly our materials to the web.
Knowing how to create such a “static site” is an important skill in minimal and sustainable digital arts and humanities.
This course site is created in GitHub Pages in three ways, using an imported repository, then forking the Minimal Mistakes theme, then from scratch. When you gain more confidence you will be able to change to other themes and customize to your own liking.
STEP 1:
- Make sure you have a Github account in which there is not already a repository {yourusername}.github.io. If you have this one set up already, I would suggest that you create a new Github account for the purposes of this course.

NB: Your account and your page does not need to reveal your identity in any way. Feel free to consider this account a “burner” account for the purposes of this semester. Once you have gotten your grade, feel free to delete it or to repurpose the Markdown files for another site.
At some point in the near future, Github will require you to have multifactor authentication (2FA). We will not cover that here.
-
Make sure you have downloaded a text editor of your choice. This lab write up will explain with Sublime Text for simplicity. Others are possible, but not explained here.
-
Make sure you have downloaded Github Desktop.
STEP 2
- Importing a repository
One possibility for your website is the jekyll-academic template. Go to repositories and click on the green button new.Full instructions for this can be found here
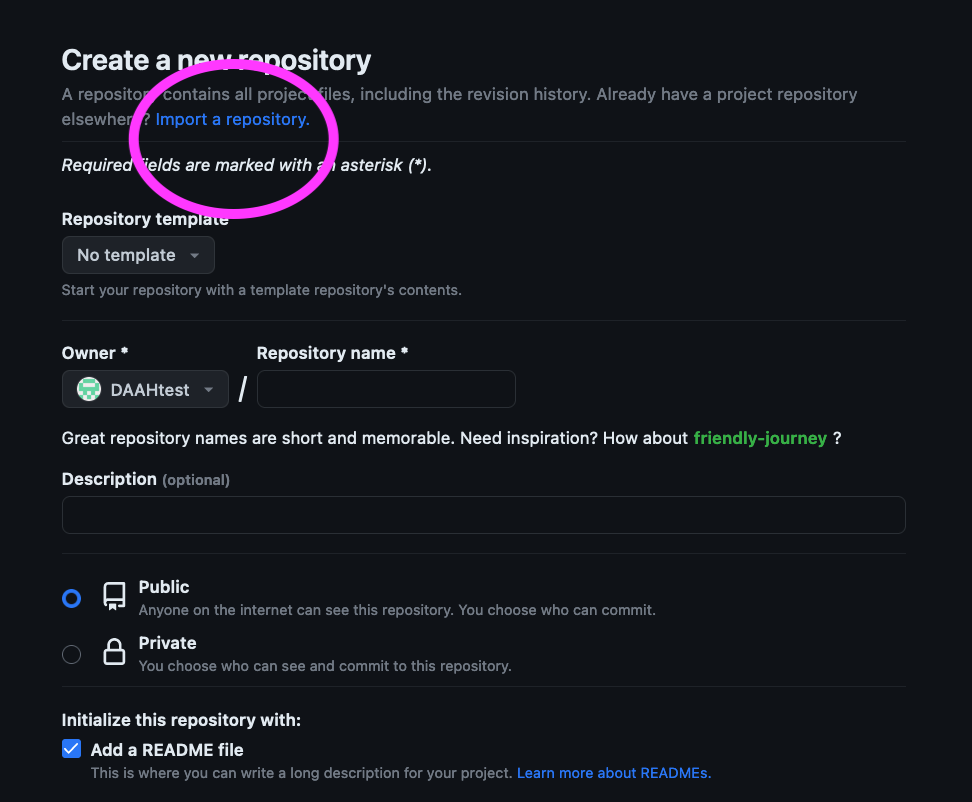
You will see a screen for creating a new repository. Click on import a repository.

Where it says your old repository's clone URL insert https://github.com/NCSU-Libraries/jekyll-academic.
And where it says new repository details insert {yourGitHubusername.github.io}. This must match the name of your GitHub user, e.g. github.com/yourGitHubusername.
Click on begin import.
After import look at the repository that has been created for you as well as what it contains. Most you want to look in the _config.yml files or folders like _data and _posts.
You can use this website (and customize it) if you like for your work.
STEP 3 Forking a repo. Detailed instructions for this can be found here
-
Deleting a repository. When in repositories look in Settings, and all the way at the bottom is a repository in which you can forever delete that repository. Do so only when you want to wipe things clean.
-
Forking (copying the contents) takes place by navigating to the main page of an existing GitHub page.
For example, there is the very popular site for minimal-mistakes: https://github.com/mmistakes/mm-github-pages-starter
With your GitHub account open, navigate to this page, above the file list, click Use This Template (If you do not see it, you may have to go to Settings to click it on). Select create a new repository. This will take what was there and bring it over into your account.
The detailed instructions linked above give another same template and point you to many more.
You can use this website (and customize it) if you like for your work.
- Cloning this repository to your machine with Github Desktop
Open GitHub Desktop and log into it with your credentials from your GitHub account. Setting > Accounts.
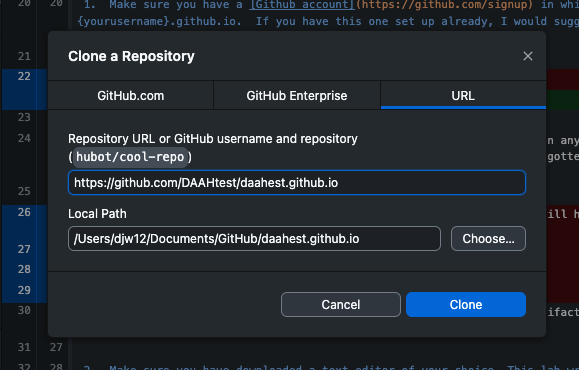
Then, using the URL of the repository where you forked the minimal-mistakes template, navigate to file > clone repository.
Selecting URL, paste that URL into the repository URL blank and click clone.

When done, you should be able to see it in the current repository tab at left in Github Desktop.
- Editing the repository on your own machine.
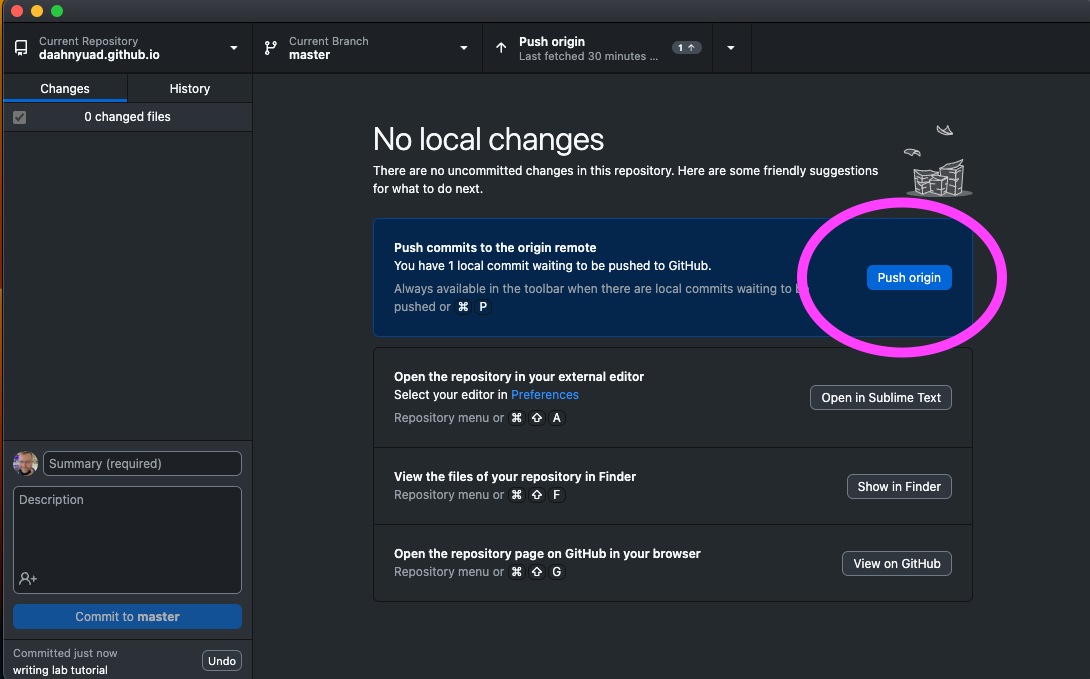
Now that you have a copy of the repository on your laptop you can edit it there and “push” the changes to the web.
When you edit and save (and sometime enter a commit message), you will see a blue button to transfer these changes to the web.

NB: You can do some editing in the GitHub web interface itself, but I recommend this method, and not to mix the two, since you end up with a versioning nightmare.
Let’s make some changes in the Sublime Text and push them.

From GitHub Desktop you can set the text editor you want to work in.
Remember that every time you push to the web, the compiler works to make your page’s updates. Be patient and look for the green arrow.
STEP 4
- Building a site from Scratch.
Repeat the step 5 to delete the repository. In this step we will do this more systematically, using steps 3 and 4 of the abovementioned tutorial.
Create a repo. Name it with your username. Click add a readme file.
Create a _config.yml file from scratch. Check out the supported themes page. Add in the theme name in the _config.yml_ file.
Go to Github Desktop and clone the repository.
Add successive pages. index.html _posts
We will follow the instructions here